Exploring water clarity with a DIY Secchi disk
Summary
In this lesson, learners will investigate water clarity by building a simple Secchi disk and conducting basic tests in different environments. This activity will help learners understand water clarity and its importance in assessing water quality, as well as how different materials affect water clarity.
All of our lessons are designed with two parts — an in-classroom and a field component. You can choose to do the lessons in succession over multiple days, at a convenient time, or teach either part as a stand-alone lesson. The activities are presented as small group activities to facilitate and encourage active participation. At the bottom of the page, you will find a section on ocean and real-world connections, external links to learning resources and additional activities for a wider range of ages, and a glossary of terms.
Recommended grades
This activity is recommended for grades 4 to 6. We’ve included tips to adapt the activity for a wide range of students throughout the lesson.
Learning outcomes
- Build a Secchi disk out of everyday materials.
- Use the Secchi disk to measure water clarity in different types of environments.
- Discover the factors influencing water clarity, including the impact of household and natural materials, particles, and minerals.
- Recognize the effects of various factors such as natural processes, pollution, and depth on water clarity.
Background
What is water clarity?
Water clarity refers to how clear or transparent water appears to the naked eye. It tells us how easily we can see objects beneath the surface of water because light passes through. When water is clear, sunlight goes through easily, helping underwater plants grow and providing a good habitat for aquatic animals. On the other hand, lower clarity means that the water is cloudy or murky because of different particles and substances in the water. Scientists use tools like Secchi disks or tubes to quantitatively measure water clarity, which is an important indicator of water quality in aquatic environments.
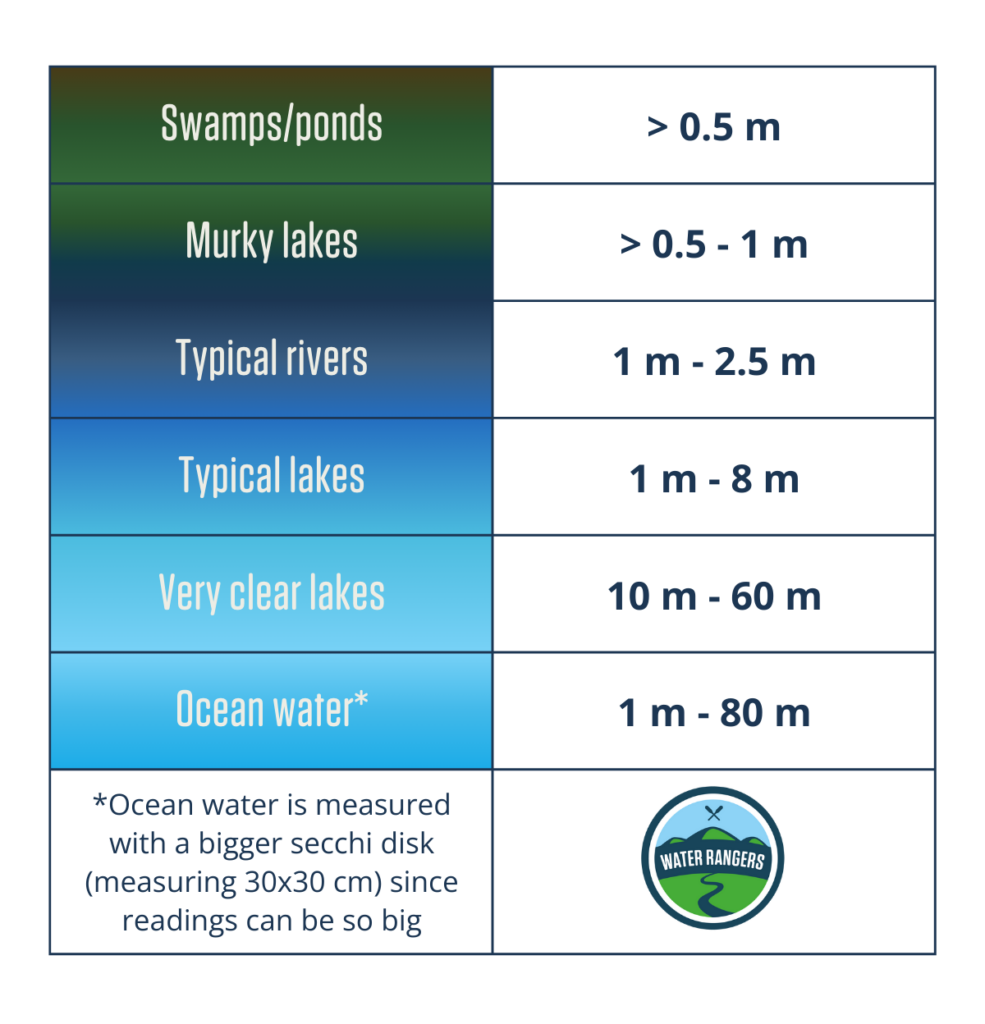
Baseline testing is important as each body of water will have unique factors contributing to water clarity. Some very healthy lakes will have very low readings if they are naturally muddy or coloured. Recording in the same place over time will give you a more accurate picture of what is normal for your body of water.
What affects water clarity?
Several factors can influence water clarity:
- Particles: Sediments, such as rocks and soil, or other organic matter can float in water, reducing its clarity. These particles can be natural, like soil erosion, or human-made, like plastics and chemicals.
- Natural processes: Natural events like erosion, rainfall, runoff, and changes in water flow can impact water clarity by adding more particles or stirring up the water.
- Pollution: Human activities introduce pollutants that can dissolve and affect clarity. These activities could be urban runoff, agricultural practices, industrial discharges, and improper waste disposal.
- Depth and sunlight: Clarity can also vary with the depth of water and the amount of sunlight reaching it. Deeper water tends to have lower clarity due to less light penetration, while sunlight can illuminate and affect visibility in shallower waters.
- Temperature and seasonal changes: Changes in water temperature and seasonal variations can impact the growth of algae, phytoplankton, and other aquatic life, affecting water clarity.
- Algae and phytoplankton: Excessive growth due to nutrient pollution can cloud water, leading to algal blooms that reduce clarity and oxygen levels, affecting aquatic life.
Understanding these factors helps scientists assess and manage water quality to ensure the health of aquatic ecosystems and the safety of water for human use.
Completely natural as well as human-made materials can affect water clarity. Be sure to note if you’ve had a recent rainfall or if you’ve noticed unusual events near the test site.
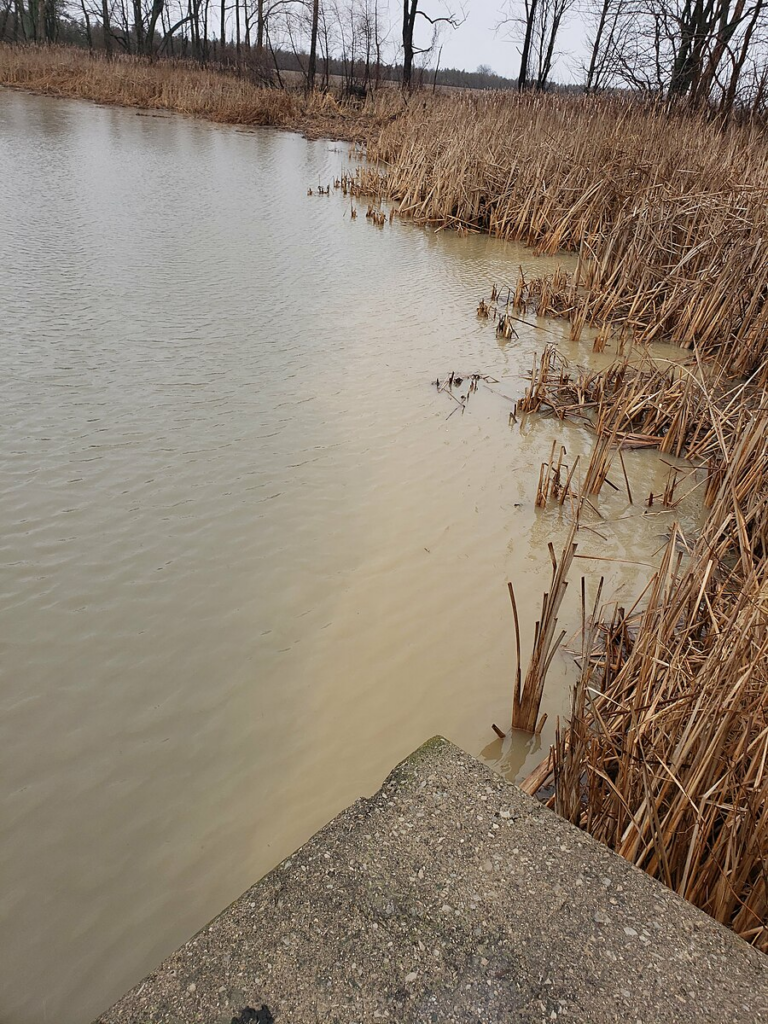
This observation captured by Lake Eerie Guardians at Willow Creek, Ontario is a great example of changes in water clarity. Soil and sediment stay near the shoreline vegetation and cause a brownish colour compared to the clearer greyish colour of the rest of the creek. Check out the observation!
DIY Secchi disk
Location: In the classroom
Duration: 45 minutes
Objective: Make a simple version of a scientific tool.
Groups: We recommend groups of 3-4 students per sample station for this activity.
Materials needed
Teacher tip!
If you are short on time or working with a younger group, you can ask them to make their secchi disk at home with a parent!
Here is an easy video on how to do it.- Clear or white bottle cap
- Black permanent marker
- A coin or something to use as a small flat weight
- Hot glue or strong transparent tape
- White or light-colored string
- Ruler
- Tooth pick
- Scissors
- Pencil
- 3 pieces of white paper
- 3 large glasses
- Liquid measuring cup (not absolutely necessary)
- 1 bottle of 2L dark colored soda, or make your own colored water with dies
- 2L of water
- Note taking material for each student
Preparation
You can prepare the glasses with the solutions before the activity, while the students are working on their Secchi tubes, or ask them to prepare them:
- On the white pieces of paper, write “Sample 1”, “Sample 2”, and “Sample 3”. Place a glass on top of each one, on the part that is still white.
- Using water and your colored liquid, make three different samples. Try to have the same amount of liquid (or height) in each glass. You can use a measuring cup if available.
- Fill the glasses as follows:
- Sample 1: 3/4 water and 1/4 soda
- Sample 2: 1/4 water and 3/4 soda
- Sample 3: all soda
- You can make several stations of these samples according to the number of learners doing the activity.
- You can watch this video to familiarize yourself with the entire activity.
Steps
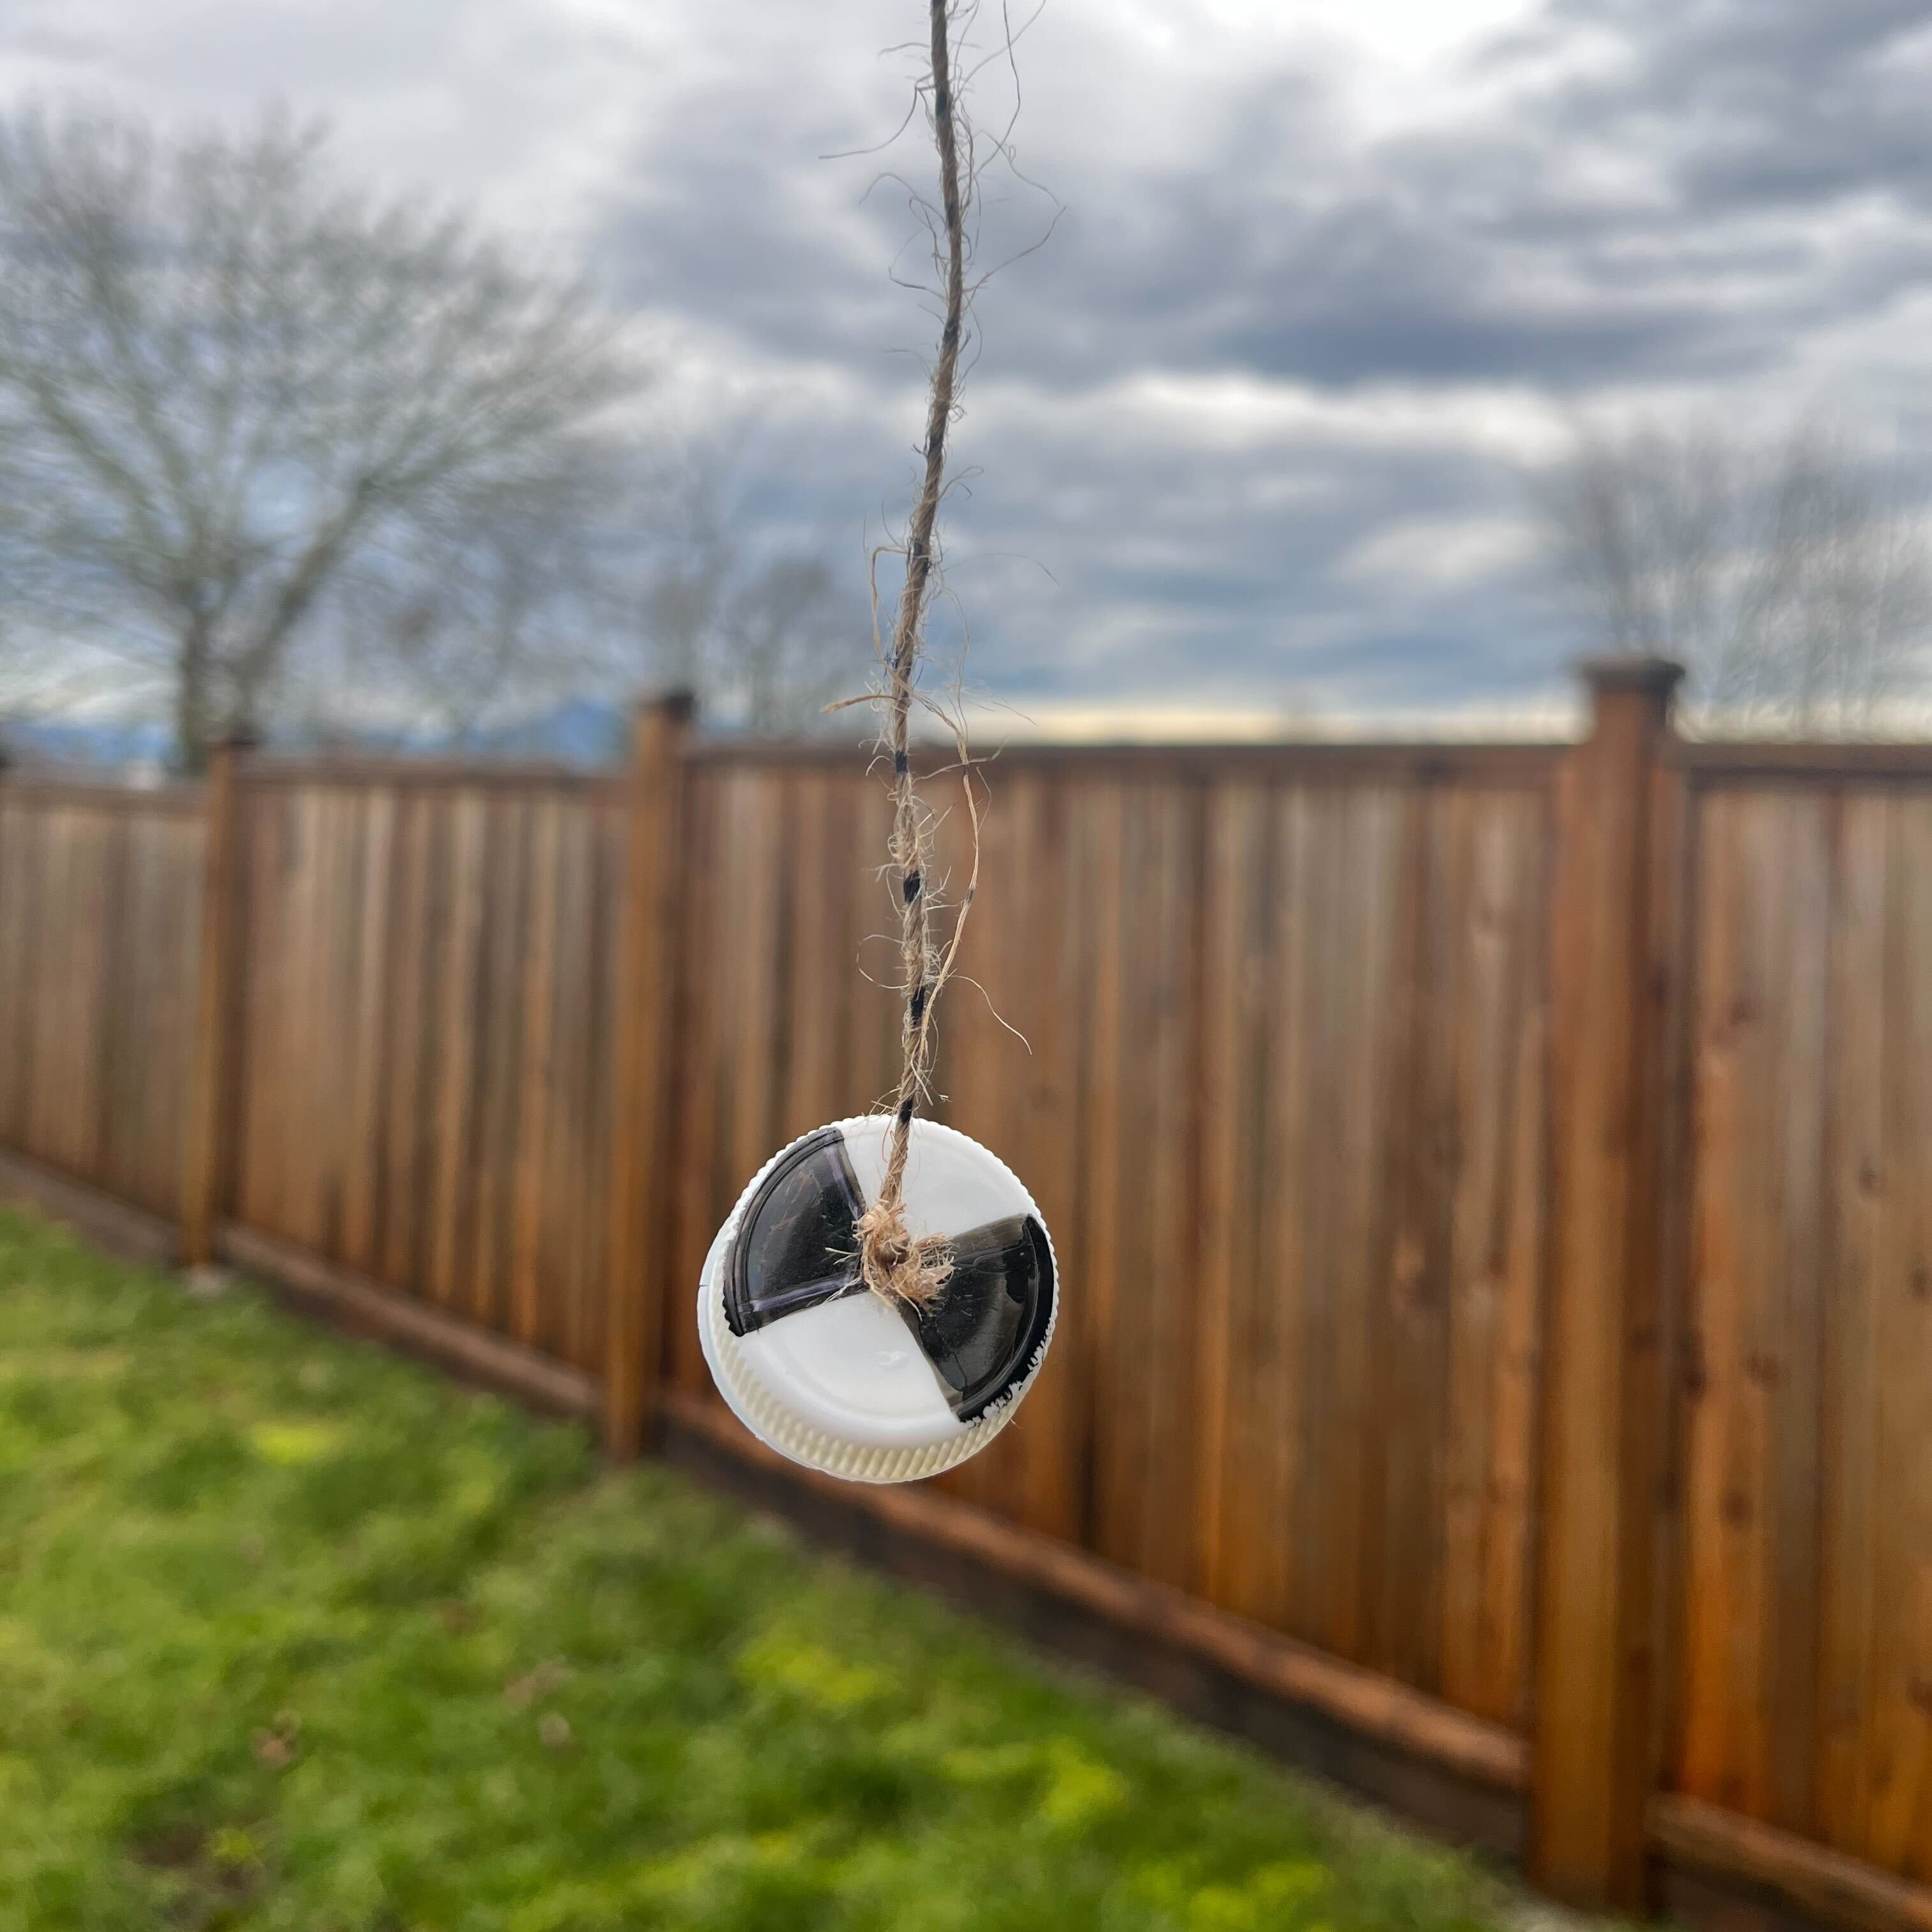
Making the Secchi disk
Each student should make their own Secchi disk.
- Draw 4 sections on the top of the bottle cap. You can show a real Secchi disk as an example or draw a simple design on the board for students to copy.
- Fill in black two opposite pieces of the pie with a black permanent marker.
- Cut a 30-centimeter piece of string or hand out pieces of that length to students.
- Instruct students to make a knot at one end of the string.
- Use the black permanent marker and ruler to mark the string at every centimetre after the knot.
- Attach the coin (weight) under the cap using glue or tape. This will prevent the disk from floating.
- Attach the knot on the string to the middle of the disk using glue or tape. Press down with the toothpick firmly to secure the knot.
Testing the Secchi disk
Demonstrate to the class how to test their Secchi disk, and then students can take turns testing their Secchi disks in each sample.
Teacher tip!
For older students, instead of using soda, use other types of matter like soil, sand, or decomposing leaves. You can create a mixture in a glass (mix it vigorously) and instruct them to take a reading right away, then wait 2 minutes to take another, and finally 5 minutes to take the last one. This will teach them about how strong currents, or weather events (like storms, strong wind), can impact water clarity.
- Lower the Secchi disk into each glass until it becomes invisible.
- Bring it up slightly and lower it again to find the exact spot where it disappears.
- Pinch the string at the top of the liquid and pull it out while still pinching it.
- Count the number of black marks from the knot to where you are pinching the string.
- Record the value next and sample number in your notebook.
- If you can lower the disk all the way to the bottom, record the water depth instead of the Secchi depth. This indicates very clear water.
- Repeat for each sample.
Reflection and discussion
Teacher tip!
The discussion and reflection section can be used to evaluate the student’s knowledge.
- How did the depth where the Secchi disk became invisible vary in the different glasses of water? What does this tell us about water clarity?
- How would different types of water (clear water, water with some sediment, and water with a high amount of sediment) affect the visibility of a Secchi disk?
- How do you think the clarity of water can affect the growth and survival of underwater plants and organisms?
During the activity, we saw that the Secchi disk disappeared at different depths in the glasses of water and soda mixtures. This tells us that the clarity of the water varied. Differences in water clarity can affect the types of plants and animals that can survive in the water body. Lots of aquatic organisms, like seagrass and phytoplankton, need sunlight for photosynthesis — the process of making food. If the water is murky or unclear, sunlight may not penetrate deep enough for them to thrive. On the other hand, clearer water increases in temperature faster, which affects lots of other parameters we measure. Understanding water clarity helps us understand the conditions that support different types of aquatic life!
Measuring water clarity outdoors
Location: At a local water body, ideally by a dock with easy access to water. Alternatively, this activity can be done anywhere outside using buckets.
Duration: 30 minutes
Objective: To measure water clarity outdoors by using Secchi disks to observe how different materials or natural factors can affect water clarity.
Groups: We recommend groups of 5 students maximum for this activity.
Materials needed
- Water Rangers Secchi disk
- Homemade Secchi disks made from the classroom activity
- If you don’t have access to a water body:
- 3-5 medium to large buckets
- 3-5 large bowls depending on how many materials you want to add.
- A scooper for each bowl of material.
- Different materials that affect water clarity: natural like rocks and soil, household items like flour, food colouring, sand, etc.
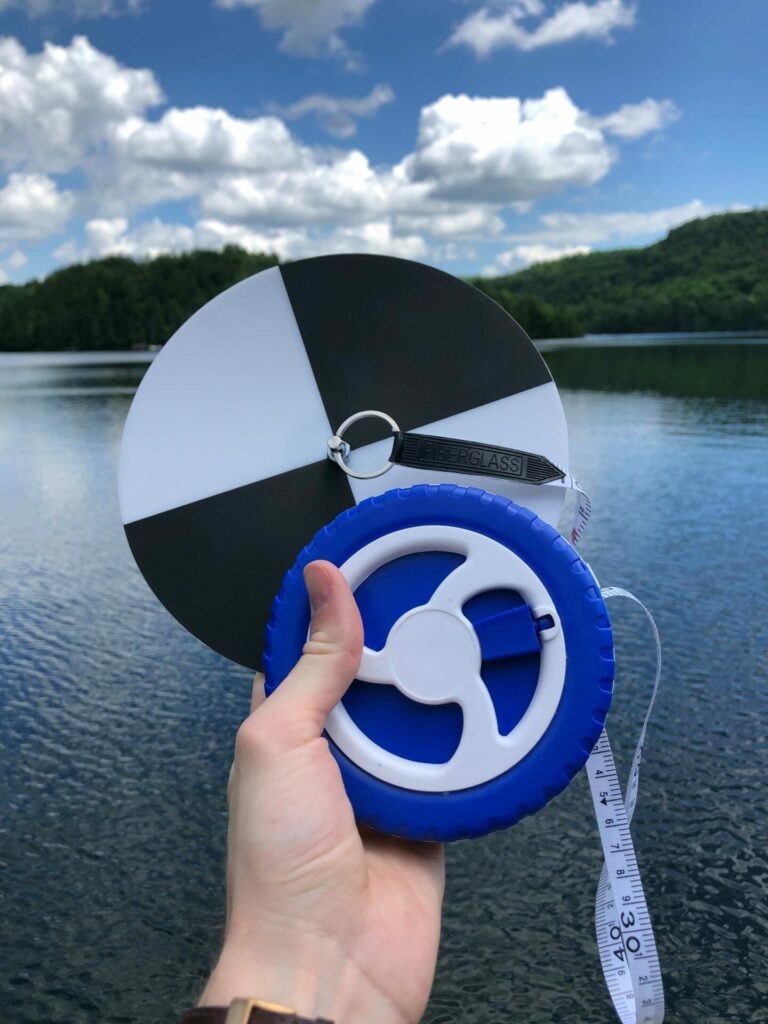
How to use Water Rangers Secchi disk
If you are near a stream or pond and it’s safe, bring your class by the water, ideally to a dock with access to deeper water. Always follow our safety tips for waterfront activities. If the water is deeper than 0.5 m, students must wear a life jacket or personal floatation device. In case safe water access isn’t available, you can set up large buckets for the activity and consider the materials you want to add ahead of time.
Preparation using buckets
- To set up, fill the buckets with water ahead of time.
- Consider having one group per bucket for focused observations.
- Optionally, you can designate each station to have a different mix based on materials (e.g. organic vs. household materials, etc.) and have groups rotate and test at each station.
- Encourage creativity by brainstorming materials with your students ahead of time to add for different clarity environments.
- Students can collect items like rocks, soil, twigs, branches, etc., if they are in a wooded area.
- You can also provide bowls of non-toxic household items such as flour, food colouring, and sand with scoopers for students to easily add to the buckets.
Steps
Using buckets
Students can use their DIY Secchi disks for this experiment and then take turns using the Water Rangers Secchi disk.
- Mix the materials in the buckets.
- Take the initial measurements of clarity.
- Wait for 5 minutes.
- Measure clarity again and observe differences.
- Encourage students to mimic rainfall and wind effects by gently stirring or shaking the buckets and immediately taking the clarity measurement.
By a water body
- Share information about the water body where you are located. Ask students if they know any facts or what they would like to discover later.
- Ask students to observe their surroundings. Encourage them to note any sources that could influence the clarity of the water body. This could include rocks, soil, vegetation, sewage pipes, etc.
- What do they see/notice?
- What sounds do they hear?
- What do they smell from where they stand/sit?
- Identify a safe spot for students to access the water. Demonstrate to students how to take a reading:
- Lower the disk slowly into the water in a sunny area, dropping it straight down.
- Raise the disk slightly until it becomes visible, then lower it back to the point of disappearance.
- Pinch the ribbon to mark the spot and record readings in meters, rounding to the closest tenth (e.g. 1.3m).
- Place students in groups of 2-4 and instruct them to take turns taking a reading.
- If you are on a dock or have multiple access points to the water, students can measure clarity at different locations, discussing any variations they find.
- Discuss differences in measurements among groups, emphasizing that slight variations are expected due to individual vision and colour perception.
- Record water clarity at one location by calculating the average of students’ findings, and upload the data to our platform!
Reflection and discussion
- Does a lower clarity imply that water quality is not as good?
- Not always! The clarity of water is influenced by various factors, and it is important to understand the normal conditions of the water body. For example, rivers flowing over hard rock formations tend to have clearer water. Additionally, ponds surrounded by leaves may have a brown but clear colour due to components from decomposing leaves leaching into the water. Therefore, lower clarity does not always indicate poor water quality, but rather the natural conditions specific to the water body.
- What would happen to plants if the water clarity suddenly decreased?
- If water clarity suddenly decreases, plants in the water may face challenges. Underwater plants rely on sunlight for photosynthesis, which is the process of making food. When the water is not clear, less sunlight can reach these plants, affecting their growth. They may struggle to produce enough food, resulting in stunted growth or even death. A sudden decrease in water clarity can make it harder for underwater plants to thrive and negatively impact their overall health.
- During what season would you expect a lower clarity and why?
- Lower water clarity is typically expected during seasons with increased rainfall or snowmelt, such as spring. Heavy rainfall or melting snow can wash soil, debris, and pollutants into water bodies. This runoff carries particles and soil, reducing water clarity. The increased presence of these particles and dirt during seasons with more rain or snowmelt can cloud the water and result in lower clarity.
Ocean connections
Mapping ocean clarity with sattelites
Understanding water clarity in the ocean is an important aspect of monitoring and assessing its health. This article explains how scientists use satellites from space to map ocean clarity and what that means. Ocean clarity is important because it tells us about the presence of suspended particles, pollutants, and other factors that can affect the health of the ocean. This information is important for protecting marine life and keeping our oceans clean. Exploring this website will help you learn more about the connection between water clarity, satellite technology, and the health of our oceans.
Observing ocean clarity from spaceReal world connections
Find out more in this article from Nevada TodayCurriculum links
Check out our curriculum connections to see how these activities fit with the curriculum of various provinces.
Glossary
Clarity: The measure of how clear or transparent a substance, such as water, is.
Photosynthesis: The process by which plants convert sunlight, carbon dioxide, and water into energy and oxygen.
Pollutants: Harmful substances introduced into the environment that can cause damage to living organisms and ecosystems. Pollutants may be in the form of gas, liquid, solid or energy.
Runoff: The flow of water, including any dissolved substances, from surfaces like roads and sidewalks into nearby bodies of water.
Sample: A small amount of liquid taken for testing or analysis.
Sediment: Solid particles that settle at the bottom of a liquid, such as sand, rocks, minerals, or silt.
Turbidity: The cloudiness or haziness of a fluid caused by lots of particles that are generally invisible to the naked eye.